Safe Or Dangerous iOS App
678 Words ~4 Minute Reading Time • Subscribe to receive updates on Software
Building an AR Danger Detector with Swift, ARKit and Core ML
One of the most exciting intersections of our technology today is that of augmented reality (AR) and machine learning (ML). Today, we'll dive into a practical example of how we can use Apple's ARKit and Core ML to build a simple, yet effective danger detector.
Initial Setup
Our app is built using SwiftUI, and its primary view is a simple AR view. It uses the ARView from RealityKit to provide a camera feed for AR.
import SwiftUI
import RealityKit
import ARKit
import Vision

struct ContentView : View {
    var body: some View {
        ARViewContainer().edgesIgnoringSafeArea(.all)
    }
}
The Main Logic
The main logic of our application is handled in the ARViewController. We initialize the AR view, load the Core ML model (we're using MobileNet for object detection), and setup the Vision request.
class ARViewController: UIViewController, ARSessionDelegate {

    var arView: ARView!
    var visionRequests = [VNRequest]()
    var classificationLabel: UILabel!
    let dispatchQueueML = DispatchQueue(label: "com.hw.dispatchqueueml")

    override func viewDidLoad() {
        super.viewDidLoad()

        // Setup ARView
        arView = ARView(frame: self.view.frame)
        self.view.addSubview(arView)

        // Setup Classification Label
        classificationLabel = UILabel()
        classificationLabel.frame = CGRect(x: 0, y: 0, width: self.view.frame.width, height: 100)
        classificationLabel.numberOfLines = 0
        classificationLabel.textAlignment = .center
        classificationLabel.textColor = .white
        classificationLabel.backgroundColor = UIColor.black.withAlphaComponent(0.6)
        self.view.addSubview(classificationLabel)

        // Configure AR session
        let configuration = ARWorldTrackingConfiguration()
        arView.session.run(configuration)

        // Load CoreML Model
        guard let model = try? VNCoreMLModel(for: MobileNet().model) else { return }
        let classificationRequest = VNCoreMLRequest(model: model, completionHandler: self.handleClassification)
        self.visionRequests = [classificationRequest]

        loopCoreMLUpdate()
    }
Updating the Core ML Model
We continuously update the Core ML model with data from the AR view. This is handled in loopCoreMLUpdate() and updateCoreML() functions.
    func loopCoreMLUpdate() {
        dispatchQueueML.async {
            self.updateCoreML()
            self.loopCoreMLUpdate()
        }
    }

    func updateCoreML() {
        guard let pixelBuffer = arView.session.currentFrame?.capturedImage else { return }

        var requestOptions:[VNImageOption : Any] = [:]
        if let cameraIntrinsicData = CMGetAttachment(pixelBuffer, key: kCMSampleBufferAttachmentKey_CameraIntrinsicMatrix, attachmentModeOut: nil) {
            requestOptions = [.cameraIntrinsics: cameraIntrinsicData]
        }

        let imageRequestHandler = VNImageRequestHandler(cvPixelBuffer: pixelBuffer, orientation: .up, options: requestOptions)
        do {
            try imageRequestHandler.perform(self.visionRequests)
        } catch {
            print(error)
        }
    }
Classifying the Objects
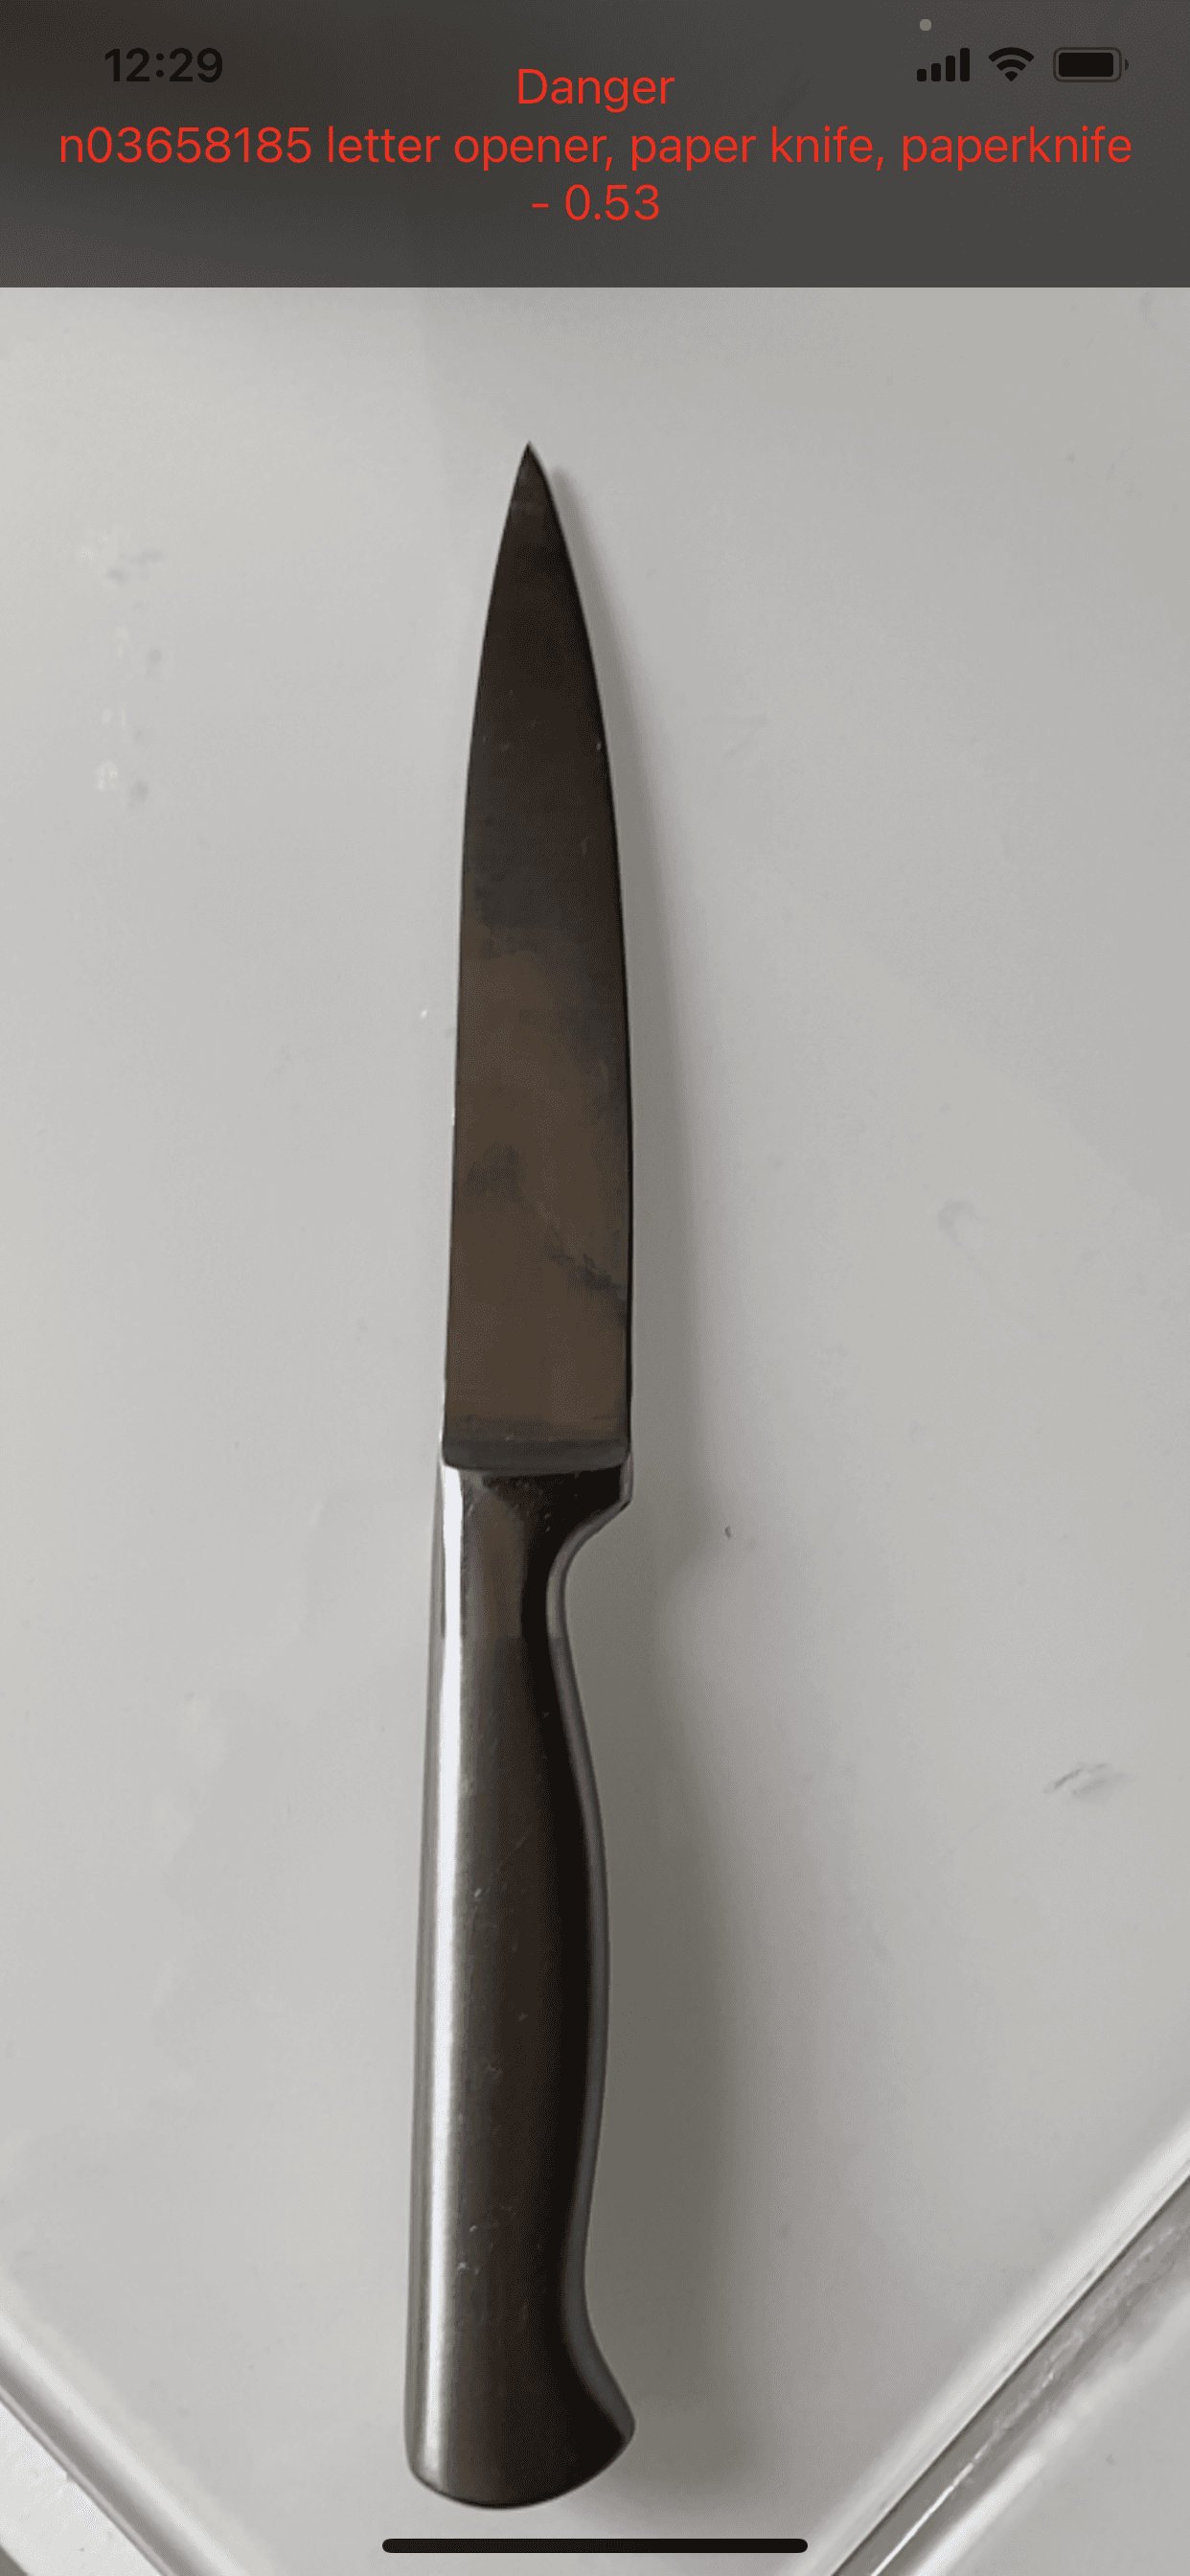
The classification happens in handleClassification(). We handle any error, get the results from the observations and classify them based on the objects. We have a pre-defined set of dangerous objects that if detected will change the label to red and display "Danger", otherwise it will display "Safe" in green.
  func handleClassification(request: VNRequest, error: Error?) {
        guard let observations = request.results else {
            print("no result")
            return
        }

        let dangerousObjects = ["knife", "meat cleaver", "cleaver", "chopper", "hatchet", "ax", "switchblade"]

        let classifications = observations
            .compactMap({ $0 as? VNClassificationObservation })
            .filter({ $0.confidence > 0.3 }) // confidence level - higher more accurate
            .map({ ($0.identifier, $0.confidence) })

        let dangerousClassifications = classifications.filter {
            dangerousObjects.contains(where: $0.0.lowercased().contains)
        }

        let status: String
        let color: UIColor

        if !dangerousClassifications.isEmpty {
            status = "Danger"
            color = .red
        } else {
            status = "Safe"
            color = .green
        }

        DispatchQueue.main.async {
            let classificationTexts = classifications.map { "\($0.0) \(String(format:"- %.2f", $0.1))" }
            self.classificationLabel.text = "\(status)\n" + classificationTexts.joined(separator: "\n")
            self.classificationLabel.textColor = color
        }

        // Logging classification data
        for classification in classifications {
            print("Logged classification: \(classification.0)")
        }
    }
}

struct ARViewContainer: UIViewControllerRepresentable {

    func makeUIViewController(context: Context) -> ARViewController {
        return ARViewController()
    }

    func updateUIViewController(_ uiViewController: ARViewController, context: Context) {}
}
The Final Result
Safe Snake:

Dangerous Knife:
Wrapping Up
Using ARKit and Core ML, we've built a simple but efficient danger detector. This is a very rudimentary example of how powerful and versatile these tools can be when combined. In future projects, you might consider training your model on a wider array of dangerous objects, or even using a more powerful model for better accuracy. The possibilities are virtually limitless with this tech stack!
Supporting My Work
Please consider Buying Me A Coffee. I work hard to bring you my best content and any support would be greatly appreciated. Thank you for your support!